Showing posts with label cookies. Show all posts

Thursday, May 13, 2010

Operation Baking Gals Round 19

For Round 19 of Operation Baking Gals, I joined Beantown Baker's team who just happened to be sponsoring one of my friend's husbands this round! We all baked for Richard who has been overseas for almost a year now. His tour will be up next month, and he will get to return home to his wife and 2 kids who have missed him terribly!


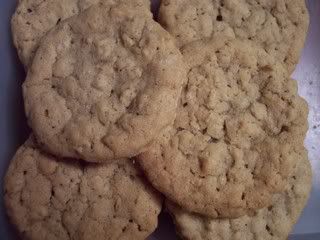
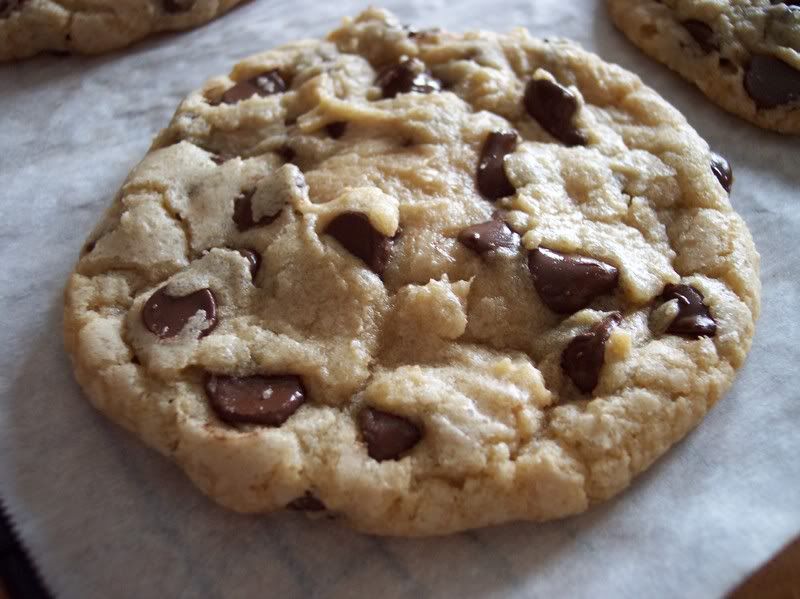
The first cookies I included this time were Peanut Butter Oatmeal Chocolate Chip Cookies. Quite a mouthful! I found this recipe on Brown Eyed Baker and thought it would work well for the long trip overseas because it makes a thick and moist cookie.


Peanut Butter Oatmeal Chocolate Chip Cookies

1 cup all-purpose flour
1 teaspoon baking soda
¼ teaspoon salt
1 stick (½ cup) unsalted butter, at room temperature
½ cup creamy peanut butter
½ cup granulated sugar
1/3 cup light brown sugar
½ teaspoon vanilla extract
1 egg
½ cup rolled oats
1 cup semisweet chocolate chips

1. Preheat oven to 350 degrees F. Line two baking sheets with parchment paper and set aside.

2. Whisk together the flour, baking soda and salt; set aside.

3. On medium speed, cream together the butter, peanut butter, granulated sugar, brown sugar and vanilla extract, about 3 minutes. Add the egg and beat to combine. On low speed, gradually add the flour until just combined. Stir in the oats, and then the chocolate chips.

4. Use a large cookie scoop (3 tablespoons) and drop dough onto prepared baking sheets about 2 inches apart. Bake for 10 minutes, or until the cookies are lightly golden. Cool completely on the baking sheet and then store in an airtight container at room temperature.


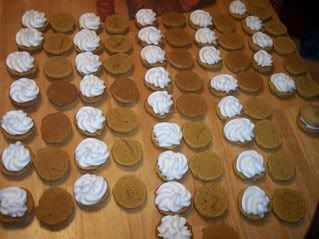
The next cookies I included were basic cake mix cookies. I made these last week as sandwich cookies with a cream cheese frosting filling and loved them. I thought they would work well for shipping (without the frosting) because they stayed moist for days.


Devil's Food Cake Mix Cookies

1 box Devil's Food cake mix
2 eggs
1/3 cup vegetable oil


Mix all ingredients well. Use a medium cookie scoop to drop on parchment lined cookie sheets 2 inches apart. Flatten slightly. Bake at 350 degrees for 8-10 minutes. Cool on wire racks.

Last, I included caramel corn. This stuff is addicting!


Caramel Corn
from Allrecipes

  • 1 cup butter
  • 2 cups brown sugar
  • 1/2 cup corn syrup
  • 1 teaspoon salt
  • 1/2 teaspoon baking soda
  • 1 teaspoon vanilla extract
  • 5 quarts popped popcorn

Directions

  1. Preheat oven to 250 degrees F (95 degrees C). Place popcorn in a very large bowl.
  2. In a medium saucepan over medium heat, melt butter. Stir in brown sugar, corn syrup and salt. Bring to a boil, stirring constantly. Boil without stirring 4 minutes. Remove from heat and stir in soda and vanilla. Pour in a thin stream over popcorn, stirring to coat.
  3. Place in two large shallow baking dishes and bake in preheated oven, stirring every 15 minutes, for 1 hour. Remove from oven and let cool completely before breaking into pieces.


I also filled in all the extra space in my flat rate box with candy and nuts. I hope Richard enjoys!


Saturday, February 20, 2010

Peanut Butter Crinkle Cookies


My dad loves peanut butter cookies, so I decided to make him some this morning. I have had this recipe from Baking Blonde starred since September 2008. I'd say it was about time to make them! I love the addition of powdered sugar for rolling instead of granulated sugar.


Peanut Butter Crinkle Cookies

1 cup butter
1 cup creamy peanut butter
1 cup brown sugar
1 cup sugar
2 eggs (room temperature)
2 tsps vanilla extract
2 1/2 cups flour
1 tsp baking powder
1 tsp baking soda
1/2 tsp salt
1 cup powdered sugar (or more as needed for rolling)

Preheat oven to 350. Line baking sheets with parchment paper. Place powdered sugar in shallow bowl.


In a large mixing bowl, cream together the butter and peanut butter. Once combined beat in the white sugar, and brown sugar until well blended. Beat in the eggs and vanilla.


In a large bowl wisk together the flour, baking powder, baking soda and salt. Gently add to creamed mixture and mix until almost combined.


Chill dough for 10-20 minutes.

Roll tablespoonfuls of dough into balls. Genlty roll the dough balls into powdered sugar and place dough balls on parchment lined baking sheets. Carefully press down on each ball with a glass to flatten tops slightly.

Bake for 10-12 minutes in the preheated oven, or until top is crinkly and edges are set. Cool on sheet for 10 minutes and transfer to baking rack to finish cooling


Thursday, January 28, 2010

Chocolate Chip Cookie Dough Cupcakes

These chocolate chip cookie dough cupcakes are probably the best thing I have made EVER. I am in love with them. Soooooooooo good if you love the taste of cookie dough.

Chocolate Chip Cookie Dough Cupcakes
From Hello Baker


Chocolate Chip Cookies

Alton Brown’s “The Chewy”

(Recipe from Alton Brown)

  • 2 sticks unsalted butter
  • 2-1/4 cups bread flour
  • 1 teaspoon kosher salt
  • 1 teaspoon baking soda
  • 1/4 cup granulated sugar
  • 1-1/4 cups brown sugar
  • 1 egg
  • 1 egg yolk
  • 2 tablespoons milk
  • 1-1/2 teaspoons vanilla extract
  • 2 cups semisweet chocolate chips

**The dough placed in the cupcakes MUST be frozen in order to produce that nice gooey cookie dough center. You DO NOT want the dough to actually bake into a cookie. Also remember to save some of the dough for your mini chocolate chip cookies to be used as decoration at the end!**

  1. Heat oven to 375 degrees F.
  2. Melt the butter in a heavy-bottom medium saucepan over low heat. Sift together the flour, salt, and baking soda and set aside.
  3. Pour the melted butter in the mixer’s work bowl. Add the sugar and brown sugar. Cream the butter and sugars on medium speed. Add the egg, yolk, 2 tablespoons milk and vanilla extract and mix until well combined. Slowly incorporate the flour mixture until thoroughly combined. Stir in the chocolate chips.

For the dough center: Place dough in the freezer until it is firm enough to be rolled up into nice little balls. Take dough out, roll them into whatever size you desire (mine were probably as large as How To Eat A Cupcake’s) and then place back into freezer until completely frozen (I believe I did this step the night before when I made the dough).

For cookies: Chill the dough, then scoop onto parchment-lined baking sheets, 6 cookies per sheet. Bake for 14 minutes or until golden brown, checking the cookies after 5 minutes. Rotate the baking sheet for even browning. Cool completely and store in an airtight container.

Brown Sugar Cupcakes

(Recipe from Cupcake Bakeshop. Makes about 12 cupcakes)

  • 3/4 cup (1-1/2 sticks) unsalted butter, room temperature
  • 3/4 cup light brown sugar
  • 2 large eggs, room temperature
  • 1-1/3 cups all-purpose flour
  • 1/2 teaspoon baking powder
  • 1/2 teaspoon baking soda
  • 1/8 teaspoon salt
  • 1/2 cup milk
  • 1 teaspoon vanilla
  1. Preheat oven to 350 degrees.
  2. Beat butter on high until soft, about 30 seconds.
  3. Add sugar. Beat on medium-high until light and fluffy, about 3 minutes.
  4. Add eggs one at a time, beat for 30 seconds after each.
  5. Whisk together flour, baking powder, baking soda, and salt in a bowl.
  6. Measure out milk and vanilla together.
  7. Add about a fourth of the flour to the butter/sugar mixture and beat to combine.
  8. Add about one third the milk/vanilla mixture and beat until combined.
  9. Repeat above, alternating flour and milk and ending with the flour mixture.
  10. Place previously prepared frozen cookie dough ball (mine were fairly big) into cup liners, then fill about half to three-quarters full of cupcake batter.
  11. Bake for 20-22 minutes until golden and the cake springs back when lightly touched. (Testing by using a toothpick would be insufficient because of the gooey cookie dough in the center).

Cookie Dough Frosting

(Recipe from The Cupcake Review. Makes enough to frost 12 cupcakes.)

  • 1-3/4 cups confectioners sugar
  • 1/2 cup unsalted butter, chilled
  • 1/8 teaspoon salt
  • 1/2 teaspoon vanilla extract
  • 1 tablespoon milk
  • Eggless cookie dough (recipe below)
  1. In the bowl of an electric mixer fitted with the paddle attachment, combine 1-1/4 cups confectioners’ sugar, unsalted butter, salt, and vanilla, scraping down the sides of the bowl with a spatula as necessary.
  2. Add milk and continue mixing until well combined, scraping down the sides of the bowl with a spatula, as necessary. With the mixer running, slowly add remaining 1/2 cup confectioners sugar, mix until well combined.
  3. At this point you can mix in the eggless cookie dough. Mix in enough cookie dough to suit your taste. Any cookie dough leftover you can gladly eat! There are no eggs in it so it is safe. Yum!

Eggless Cookie Dough

(Recipe from How To Eat A Cupcake)

  • 1/4 cup butter, softened
  • 1/4 cup brown sugar, plus 2 tablespoons
  • 2 teaspoons water
  • 1/2 teaspoon vanilla
  • 1/2 cup flour
  • 1/4 teaspoon salt
  • 1/3 cup mini chocolate chips (optional)
  1. Cream the butter and brown sugar in a small bowl. Add water and vanilla and mix well. Add flour and salt and stir to combine. Stir in mini chocolate chips (optional).
  2. Store in refrigerator until ready to use.


Complete Assembly

This is just a little summary of what you should have done:

  1. Make cookie dough balls and place them in the freezer until ready to be used.
  2. Insert a ball of cookie dough into each cupcake liner before baking.
  3. Mix vanilla buttercream frosting with eggless cookie dough to create cookie dough frosting.
  4. Allow cupcakes to cool, then pipe on cookie dough frosting.
  5. Decorate by sprinkling on mini chocolate chips and topping with a mini chocolate chip cookie.

4 Layer Cookie Bars


I saw this recipe on Picky Palate and wanted to try it. She calls them "The Motherlode Layered Cookie Bars." There are 4 layers of different cookie dough. I found that the peanut butter layer was the strongest taste that came through after baking. Time consuming, but good and very rich!

4 Layer Cookie Bars
From Picky Palate

Layer 1: Sugar Cookie

1 Roll of Pillsbury Sugar Cookie Dough

1. Preheat oven to 350 degrees F. Press sugar cookie dough into bottom of a 9×13 inch baking dish that’s been lined foil and sprayed with cooking spray.

Layer 2: Double Chocolate Chip Cookie

(the recipe below makes double what you’ll need for the bars, use extra for cookies)

1 cup butter
1 cup white sugar
3/4 cup brown sugar
2 eggs
1 tsp. vanilla
1 3/4 cups flour
1 1/4 cups cocoa powder (I used Hershey’s Dark Chocolate Cocoa Powder)
2 tsps. baking soda
1/4 tsp. salt
1 1/2 cups chocolate chips

1. In a large bowl, cream together the butter and sugars until light and fluffy. Slowly add eggs and vanilla until well combined.

2. In another bowl, combine the flour, cocoa, baking soda and salt. Slowly add to wet ingredients then stir in chips. Layer 1/2 the recipe over sugar cookie layer, pressing gently.

Layer 3: Peanut Butter Cookie

1 Cup creamy peanut butter

1/2 Cup granulated sugar

1 egg

1. Place all ingredients into a bowl and mix until combined. Press over chocolate cookie dough.

Layer 4: Chocolate Chip Cookie

(the recipe below makes double what you’ll need for the bars, use extra for cookies)

2 sticks softened butter

3/4 Cup granulated sugar

3/4 Cup brown sugar

2 eggs

1 Tablespoon pure vanilla

2 1/2 Cups all purpose flour

1 teaspoon baking soda

1/2 teaspoon salt

1 bag chocolate chips

1. Make sure oven is preheated to 350 degrees F. In a stand or electric mixer cream the butter and sugars until well combined. Beat in eggs and vanilla until combined. Place flour, baking soda and salt into a large bolw; mix to combine. Slowly add to wet ingredients along with chocolate chips. Spoon 1/2 of the dough evenly over peanut butter cookie dough but don’t press, just leave uneven. Bake for 35-45 minutes or until center of dough is cooked mostly through. Edges will be brown. I covered pan with foil during the last 15 minutes of baking.

2. Let cookies cool completely. Lift out of pan with edges of foil. I cut off 1/2 inch edges and just used softer centers, but do as you wish. Edges are crispier. Drizzle top with 1/2 Cup melted chocolate chips if desired.

Oatmeal Pan Cookie

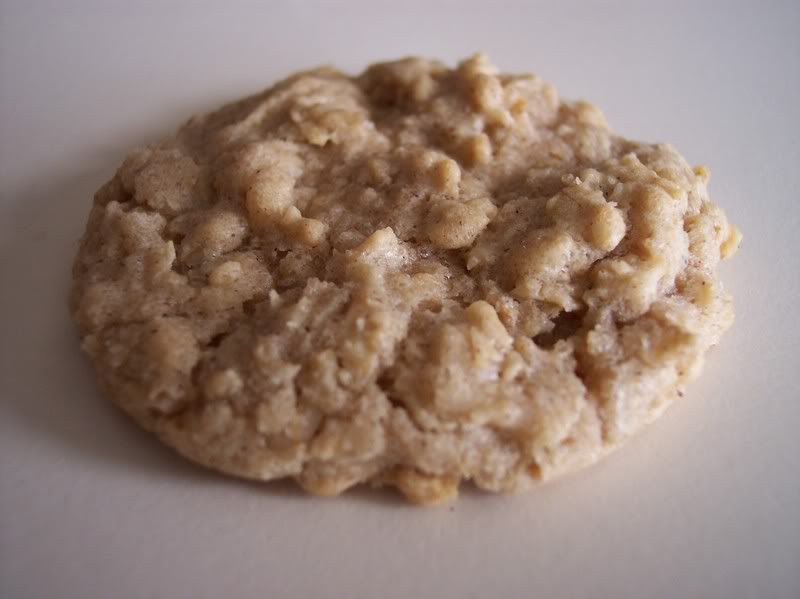
My husband loves oatmeal cookies, but lately I just don't feel like making cookies. Bars are so much easier and faster! So this makes one big giant oatmeal cookie in a 9x13 pan. He actually liked it better than the cookies because they were thick and soft.


Oatmeal Pan Cookie
1 cup all-purpose flour
1 teaspoon baking soda
1/2 teaspoon salt
1/2 teaspoon ground cinnamon
1 cup butter, softened
3/4 cup granulated sugar
3/4 cup firmly packed brown sugar
2 large eggs
1 teaspoon vanilla extract
3 cups quick cooking oats
  1. Preheat oven to 350°F. Grease a 13 x 9-inch baking dish; set aside.
  2. In a medium bowl, combine flour, baking soda, salt and cinnamon.
  3. In another mixing bowl, combine butter, sugar, brown sugar, eggs and vanilla. With an electric mixer at medium speed, beat until light and fluffy. Gradually add flour mixture to the butter mixture to blend. Stir in oats and butterscotch chips; mix well.
  4. Spread batter into baking dish; bake for 20 to 25 minutes or until golden and set.


Thursday, October 8, 2009

Pumpkin Cookies with Cream Cheese Frosting


It's offically Fall which means time for lots of pumpkin treats! I couldn't find canned pumpkin at my two usual grocery stores until this week, so I've been saving recipes like crazy. Now it's time to make some of them. These are the perfect fall cookie- pumpkin and cream cheese frosting. Such a great pair. The cookies are very, very moist and almost like a dense cake.
Pumpkin Cookies with Cream Cheese Frosting
Ingredients
1 cup butter flavored shortening
1 cup unsalted butter; softened
2 cups white sugar
2 cups canned pumpkin (solid; not pie mix)
2 eggs
2 teaspoons baking soda
3 teaspoons ground cinnamon
2 teaspoons pumpkin pie spice
1/2 teaspoon nutmeg
1 teaspoon salt
4 cups all-purpose flour
Cream shortening, butter, white sugar and pumpkin. Add eggs and mix well.
Sift together the baking soda, ground cinnamon, pumpkin pie spice, nutmeg, salt and flour. Add to pumpkin mixture and mix well.
Drop from 1/4 cup cookie scoop to cookie sheet. Bake 13-15 minutes at 350 degrees F (175 degrees C).
Cream Cheese Icing
1 (8 ounce) package cream cheese, softened
2 tablespoons butter, softened
4 cups confectioners' sugar
1 teaspoon vanilla bean paste (extract will also work)
1 Tablespoon milk
Mix the cream cheese with the butter, confectioners' sugar, vanilla extract, and milk in a bowl. Frost and smooth with the back of a spoon or a spatula. Add sprinkles as desired.

Chewy Sugar Cookies


My original intent was to make these sugar cookies and roll them in orange sugar to be festive for October, but I couldn't find any orange sugar in my baking cabinet. They still came out pretty though. They are similar to the chewy Pepperidge Farm cookies, but they aren't quite as thick. I try not to eat much sugar, but I've already had 4 of these. That's how good they are!
Chewy Sugar Cookies
Adapted from Bunny's Warm Oven (I omitted the lemon)

Ingredients
2 3/4 cups all-purpose flour
1 teaspoon baking soda
1/2 teaspoon baking powder
1/2 teaspoon salt
1 cup butter, softened
1 1/2 cups white sugar
1 egg
1 1/2 teaspoons vanilla extract
1/2 cup sugar for rolling cookies
Preheat oven to 350 degrees. Line cookie sheets with parchment paper.
In a small bowl, stir together flour, baking soda, baking powder and salt. Set aside.
Using a mixer, beat together the butter and sugar until smooth and very fluffy. Beat in egg and vanilla extract. Gradually blend in the dry ingredients.
Roll rounded teaspoonfuls of dough into balls, and roll in sugar. Place on lined cookie sheets about 1 1/2 inches apart.
Bake 8 to 10 minutes in the preheated oven, or until lightly browned. Let stand on cookie sheet two minutes before removing to cool on wire racks.

Tuesday, September 29, 2009

Pumpkin Blossom Cookies

I couldn't resist making these cookies because they were so cute! They were very moist and tasty, but I wasn't a huge fan of the kisses on top. The cookies would be just as good without them. But they do make for such a fun presentation for fall.


Pumpkin Blossom Cookies
Recipe from Imperrfections

4 TBS butter, softened
3/4 C vegetable oil
1/2 C white sugar
1/2 C brown sugar
1 egg
1 tsp vanilla extract
1 1/4 C pumpkin puree
3 1/2 C all-purpose flour
1 1/2 tsp cinnamon
1/2 tsp ground ginger
1/4 tsp ground nutmeg
1/2 teaspoon salt
1 tsp baking powder
1 tsp baking soda
1 (11 oz) bag Hershey's Candy Corn Kisses, FROZEN
extra white sugar for rolling the cookies

Preheat oven to to 350 F.Unwrap 40 candy kisses and place in a bowl and put in the freezer (because these candies are mostly oil and sugar, if not frozen then they melt into a puddle super fast when placed on a hot cookie).

Cream together the butter, oil, and sugars then stir in the egg, vanilla, and pumpkin. Add the flour, cinnamon, ginger, nutmeg, salt, baking powder, and baking soda. Mix until completely combined then stick in the freezer for about 10 minutes to firm up the dough.

Using your hands, quickly roll into large teaspoon sized balls and roll each cookie in a small bowl of sugar (if the dough starts to get too warm, place in the freezer for 5 minutes). Place sugar-rolled dough balls on a cookie sheet lined with parchment paper and bake for 10-12 minutes.

As soon as they are out of the oven, press a Candy Corn Kiss into the center of each cookie, move to a cooling rack, and place in the freezer for several minutes.

Sunday, June 14, 2009

M&M Cookies

A friend posted a link to these M&M cookies over on Taste Buds. They are very similar to M&M cookies you might find in a bakery. Kids would love them! There is no butter in the recipe- only shortening and vegetable oil. This makes for a very crisp but still a little chewy cookie.


M&M Cookies
(Recipe courtesy of Taste Buds)

1 cup brown sugar
1 cup white sugar
1 cup shortening
2 eggs
2 tsp vanilla
1 cup veg/canola oil
4 cups flour
2 tsp baking soda
4 tsp cream of tartar
1 tsp salt
2 cups m&m's

Combine first 5 ingredients and cream about 2 min. Add vegetable oil & mix well. Sift dry ingredients together and add to dough; mixing just until combined. Fold in m&m's. Place on ungreased cookie sheet and bake at 350 degrees for 10-12 min.

Tuesday, March 3, 2009

Sugar Cookie Bars

These sugar cookie bars are much easier than rolling out sugar cookie dough and using cookie cutters. You just press the dough in a jelly roll pan and bake away!


Sugar Cookie Bars
1 cup butter; room temp.
2 cups sugar
4 eggs
2 tsp vanilla
5 cups flour
1 tsp salt
1/2 tsp baking soda
Cream butter and sugar until fluffy. Add eggs, one at a time, mixing after each egg. Add vanilla & mix well.
In a separate bowl combine flour, salt & soda & stir with a whisk to combine. Add to wet mixture and mix just until combined. Spread on a greased baking sheet (use a 13 x 18 pan). Bake at 375 degrees for 10-15 min, until light golden brown or until a toothpick comes out clean.
Cool completely and frost.
Frosting
1/2 cup butter; room temp
1/2 cup shortening
1 tsp vanilla
pinch of salt
4 cups powdered sugar
5 Tbsp milk
food coloring (if desired)
For frosting combine butter and shortening until smooth and creamy. Add vanilla and salt. Add powdered sugar in 1-2 cup increments until combined, then add milk & mix until smooth and spreading consistency. Spread over cooled cookie.

Wednesday, February 25, 2009

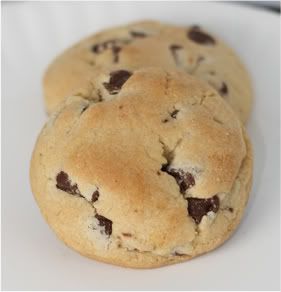
Marie's Famous Chocolate Chip Cookies


My friend Marie makes the best chocolate chip cookies that I have ever had. They are big, tall cookies that are crispy on the outside and chewy on the inside. Everyone raves about them. I have tried to duplicate them many, many times over the years. But they would never come out just right.

Finally, one day Marie came to my house and made the cookies in my kitchen. I thought for sure they wouldn't come out since I had followed the exact same recipe using my oven with no luck, but lo and behold they were perfect!
It turns out Marie's secret is to place one rack very low in the oven and one rack very high in the oven. She bakes each pan for 6 minutes on the top rack and then the bottom rack. Who knew that the rack positions could make such a huge difference? Not me!

Marie's Famous Chocolate Chip Cookies
(adapted from the Tollhouse Cookie recipe)

3 1/4 cups all-purpose flour
1 teaspoon baking soda
1 teaspoon salt
1 cup (2 sticks) butter, softened
3/4 cup granulated sugar
3/4 cup packed brown sugar
1 teaspoon vanilla extract
2 large eggs
2 cups (12-oz. pkg.) chocolate chips

Preheat oven to 375° F.
Combine flour, baking soda and salt in small bowl. Set aside.

Beat butter, granulated sugar, brown sugar and vanilla extract in large mixer bowl until creamy. Add eggs, one at a time, beating well after each addition. Gradually beat in flour mixture. Stir in chocolate chips.

Divide batter into 24 balls. A large cookie scoop works great for this. Roll the balls in your hand until they are round. Place on a baking sheet.

Position one rack very low in your oven. Position one rack very high in your oven. Place the cookie sheet on the top rack and bake for 6 minutes. Move the cookie sheet to the bottom rack and bake for 6 additional minutes.

Let cool and enjoy!


Saturday, November 15, 2008

Peanut Butter Cookies

My dad loves peanut butter cookies and has been saying he really wants some the past few weeks. He even had a pouch of mix and was trying to convince someone at home to make them for him. So since I will be seeing him today, I decided to make him some. I used the old but reliable Jif recipe.

Peanut Butter Cookies
(Recipe from Jif)

3/4 cup peanut butter
1/2 cup Crisco shortening
1 1/4 cups firmly packed light brown sugar
3 Tbs. milk
1 Tbs. vanilla
1 egg
1 3/4 cups all-purpose flour
3/4 tsp. salt
3/4 tsp. baking soda

1. Heat oven to 375°F.

2. Combine peanut butter, shortening, light brown sugar, milk and vanilla in large bowl. Beat at medium speed until well blended. Add egg. Beat just until blended.

3. Combine flour, salt, and baking soda. Add to creamed mixture at low speed. Mix just until blended. Drop by heaping teaspoonfuls 2" apart onto ungreased baking sheet. Flatten slightly in crisscross pattern with tines of fork.

4. Bake at 375°F for 7-8 minutes, or until set and just beginning to brown. Cool 2 minutes on baking sheet. Remove cookies to cool completely.

Makes about 3 dozen cookies.


Friday, October 24, 2008

Cinnamon Chip Cookies

I love cinnamon. I still have some bags of cinnamon chips left in the freezer since our local grocery store decided to clearance them all out. I don't know what I'll do once they are gone! I based this cookie off of a recipe found on Technicolor Kitchen. I found it by looking on Google Images for cinnamon cookies. I changed her recipe by leaving out the pecans and adding cinnamon chips instead. I thought they were very good, but you definitely need to like cinnamon!

I baked mine at 375 for about 14 minutes. The sheet that was on the bottom for the second half of the cooking time got a little too done. I think next time I will try baking them at 350. Or else I will bake one sheet at a time and start it on the bottom so it finishes on the top.


Cinnamon Chip Cookies

10 Tbs unsalted butter, softened
1 cup granulated sugar
1/2 cup light brown sugar
2 eggs
2 1/2 cups all purpose flour, sifted (I might try a little more flour next time)
2 teaspoons baking powder
2 teaspoons cinnamon
1 1/2 cups cinnamon chips

Preheat the oven to 375. (I might try 350 next time) Line two large baking sheets with non-stick baking paper. Place the butter, granulated sugar and brown sugar in the bowl of an electric mixer and beat until light and creamy. Add the egg and beat well.

Fold through the flour, baking powder, cinnamon and chips – dough will be very stiff. Scoop the mixture, using an ice-cream scoop, onto prepared baking sheets, spacing about 2 inches apart – cookies won’t spread much.

Place one baking sheet low in the oven. Place the other high in the oven. Bake for about 7 minutes. Then rotate and switch the baking sheets and bake for another 7 minutes or until golden. This gives the cookies less of a chance to spread. Cool on baking sheets for 5 minutes then transfer cookies to wire racks.

Friday, October 17, 2008

Hard Boiled Egg Chocolate Chip Cookies


Anna at Cookie Madness worked with a couple of other bloggers to come up with this interesting chocolate chip cookie recipe. I have to admit I was skeptical when I first read it, but the pictures were so convincing that I went for it! Warning: these are giant cookies! They are also addicting because they are so good!


Amazing Hard Boiled Egg Chocolate Chip Cookies
(borrowed from Cookie Madness)

12. 4 oz all purpose bleached flour (2 ¾ cups spooned and swept)
8 ounces cold unsalted butter, cut into small chunks (16 tablespoons)
1 teaspoon salt
1/2 teaspoon baking soda
3/4 cup granulated sugar
1/2 cup brown sugar
2 hard boiled eggs, cut into big chunks
1/2 teaspoon vanilla extract
Large handful of chocolate chips

Combine flour and butter in food processor. Pulse until mixture is mealy and coarse. Add the salt and baking soda and pulse to mix. Add both sugars and hard boiled egg. Pulse again until mixture is mealy looking. Add in the vanilla and pulse until mixture just begins to come together.

Dump mixture into a bowl, add chocolate chips and shape into eight balls. You will see egg whites in dough – they’ll disappear as the cookies bake.

Bake on a parchment lined cookie sheet at 350 degrees F. for 20 minutes or until cookies appear lightly browned around edges. Let cool on cookie sheet for 5 minutes then transfer to rack to finish cooling.

Important: Let cool completely before serving. The texture gets better as the cookies cool. It’s even better if you cool the cookies, freeze them, then thaw them.

Makes 8 big cookies


She also has a small batch version which makes only 2 giant cookies.

3.1 oz all purpose bleached flour (2/3 cup plus 1 tablespoon flour)
2 ounces cold unsalted butter (4 tablespoons)
1/4 teaspoon salt
1/8 teaspoon baking soda
3 tablespoons granulated sugar
2 tablespoons brown sugar
1/2 of a hard boiled egg
1/8 teaspoon vanilla extract
Small handful of chocolate chips

Combine flour and butter in food processor. Pulse until mixture is mealy and coarse. Add the salt and baking soda and pulse to mix. Add both sugars and hard boiled egg. Pulse again until mixture is mealy looking. Add in the vanilla and pulse until mixture just begins to come together.

Dump mixture into a bowl, add chocolate chips and shape into two balls. You will see egg whites in dough – they’ll disappear as the cookies bake.

Bake on a parchment lined cookie sheet at 350 degrees F. for 20 minutes or until cookies appear lightly browned around edges. Let cool on cookie sheet for 5 minutes then transfer to rack to finish cooling.

Important: Let cool completely before serving. The texture gets better as the cookies cool. It’s even better if you cool the cookies, freeze them, then thaw them.

Makes 2 big cookies

Sunday, September 7, 2008

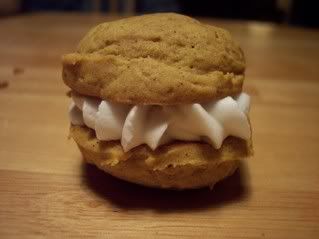
Pumpkin Whoopie Pies


Pumpkin Whoopie Pies

2 cups shortening
2 cups sugar
2 eggs
2 tsp vanilla
4 tsp cinnamon
1 tsp salt
5 cups flour
2 tsp baking soda
2 tsp baking powder
2 cups pumpkin

Filling (recipe follows)

Mix together shortening, sugar, eggs, vanilla, cinnamon and salt.

Add flour, baking soda, baking powder, and pumpkin. Mix well.

Drop by teaspoon on ungreased cookie sheet. Flatten and smooth out a little since they don’t spread much.

Bake at 350 for 12-15 minutes.

Filling
2 pounds powdered sugar
1 package cream cheese
1 tsp. vanilla
Milk by the Tablespoonful until desired consistency

Combine the sugar and cream cheese. Add vanilla and milk until desired consistency. Pipe frosting onto the bottom of a cookie. Add another cookie on top to make a sandwich.

Hubby's Favorite Oatmeal Cookies


Oatmeal Cookies

1/2 cup granulated sugar
1/2 cup packed brown sugar
5 tablespoons butter, softened
4 tablespoons shortening, I use the trans fat free kind
1 large egg
1/2 teaspoon vanilla
1 cup unbleached white flour
1/4 teaspoon baking soda
1/2 teaspoon ground cinnamon
1/4 teaspoon baking powder
1/4 teaspoon salt
1 1/2 cups regular or quick cooking oats, not instant

Using high speed of electric mixer, beat both sugars, butter, and shortening. Beat in egg and vanilla.

Sift together remaining flour, soda, cinnamon, baking powder and salt. Combine flour mixture with oats and add to batter.

Chill dough for at least one hour.

Form chilled dough into rounds a little smaller than a golfball, then press rounds into ½ inch thick discs. Place discs 2 inches apart on a parchment or silpat or non-stick baking sheet. If you do not wish to make the dough at this time, place the discs into freezer bags and chill or freeze until ready.


Bake for 10-12 minutes in a preheated 375 degree oven.

Butterscotch Gingerbread Cookies


(Photo from google.com- if this is your photo, please let me know and I will give credit)

Butterscotch Gingerbread Cookies
(courtesy of All Recipes)


INGREDIENTS

  • 3 cups all-purpose flour
  • 2 teaspoons baking soda
  • 1 1/2 teaspoons ground cinnamon
  • 1 1/2 teaspoons ground ginger
  • 3/4 teaspoon ground cloves
  • 1/2 teaspoon salt
  • 1 cup butter or margarine
  • 1 1/2 cups packed brown sugar
  • 1 large egg
  • 1/3 cup light molasses
  • 1 (11 ounce) package NESTLE® TOLL HOUSE® Butterscotch Flavored Morsels

DIRECTIONS

  1. PREHEAT oven to 350 degrees F.
  2. COMBINE flour, baking soda, cinnamon, ginger, cloves and salt in small bowl.
  3. BEAT butter, sugar, egg and molasses in large mixer bowl until creamy. Gradually beat in flour mixture until well blended. Stir in morsels. Drop by rounded tablespoon onto ungreased baking sheets.
  4. BAKE for 9 to 11 minutes or until cookies are lightly browned. Cool on baking sheets for 2 minutes; remove to wire racks to cool completely.

No Fail Sugar Cookies


No Fail Sugar Cookies
(courtesy of Cake Central)

Introduction

This recipe is GREAT when using complex cookie cutters. The dough holds its' shape and won't spread during baking. Make sure you let your oven preheat for at least 1/2 hour before baking these or any other cookies.

Ingredients

6 cups flour
3 tsp. baking powder
2 cups butter
2 cups sugar
2 eggs
2 tsp. vanilla extract or desired flavoring (I like almond myself)
1 tsp. salt

Directions

Cream butter and sugar until light and fluffy. Add eggs and vanilla. Mix well. Mix dry ingredients and add a little at a time to butter mixture. Mix until flour is completely incorporated and the dough comes together.

Chill for 1 to 2 hours (or see Hint below)

Roll to desired thickness and cut into desired shapes. Bake on ungreased baking sheet at 350
degrees for 8 to 10 minutes or until just beginning to turn brown around the edges. This recipe
can make up to 5-dozen 3” cookies.

Nutrition Information

HINT: Rolling Out Dough Without the Mess -- Rather than wait for your cookie dough to
chill, take the freshly made dough and place a glob between two sheets of parchment paper.
Roll it out to the desired thickness then place the dough and paper on a cookie sheet and pop
it into the refrigerator. Continue rolling out your dough between sheets of paper until you have
used it all. By the time you are finished, the first batch will be completely chilled and ready to
cut. Reroll leftover dough and repeat the process! An added bonus is that you are not adding
any additional flour to your cookies.

Source: kitchengifts.com

Directions taken directly from Cake Central

MAKING ICING & DECORATING COOKIES

1. I use a hardening royal icing for decorating all my cookies, as they are often to be packaged or stacked for travel. I find this recipe is less prone to chip and damage. It also adds strength to the overall cookie...and best of all, it tastes delicious! The recipe is as follows:

5 Tablespoons of meringue powder
6 ounces (3/4 cup) of warm water
1 teaspoon of cream of tartar
1 kilogram (2 lbs 4 ounces) of icing sugar (also known as "powdered sugar")

(Do note that even a drop of oil or grease will affect this icing, sometimes causing it not to set hard...so clean all your tools beforehand.)

In mixer bowl, pour in the warm water and meringue powder. Using a hand whisk only, mix 30 seconds until frothy. Add the cream of tartar and mix for 10 more seconds. All all the icing sugar at once and put the bowl on the mixer with the paddle attachment. At the slowest speed, mix for 10 minutes until the icing is stiff, thick and creamy.

2. This is your stiff icing consistency, which is perfect for assembling gingerbread houses, outlining cookies and making royal icing flowers. To protect it from crusting, always cover the bowl with a semi-damp cloth, (i.e. wet the cloth and then wring it out as much as possible. Do not let it touch the icing directly.)

For larger jobs, use a 10" or 12" minimum size of piping bag, so you don't have to keep refilling it.

3. For easy filling, slip the bag's end over a drinking glass and fill with icing.

Tie the end of your bag securely with an elastic bag or hair elastic, so that you can use it without any icing oozing out.

Keep a damp cloth on your workstation to clean dried icing from the tip occasionally.

For beginners, take this icing in your piping bag (with a #3 or #4 round tip) and do the outlines of your cookies at this time.

Stay within 1/4" from the edges of your cookies. Allow to dry for 10 minutes. This stiff outline will hold in your wetter thinned icing when you flood the cookie's surface. Don't leave the outline unfilled for longer than 15 minutes or so, as cracks tend to appear as it dries. Now thin your icing (see next paragraph below) and continue with a clean piping bag.

****HINT
For advance decorators, I prefer the look of a cookie iced WITHOUT the outline technique.

The cookie on the left was outlined and filled. The cookie on the right was filled in a single step with the exact same consistency of thinned icing. Do not outline with the stiff icing, go directly to the thinned icing consistency as described below. It saves hours of work on large batches and often looks cleaner and more professional.

To thin your royal icing, , add 1 tablespoon of water at a time. To the large recipe above, I would use between 1/8 cup to 1/4 cup (or about 2 to 3 Tablespoons) of water to thin it. If you use too much water, you can add a sprinkling of icing sugar to thicken it back up.

The consistency you are looking for for flooding (filling in) your cookies with icing can be compared to white glue, yogurt or cake batter. It should be runny, but not thin or watery. Icing that contains too much water can appear translucent, take much longer to dry...and even worse, darker/bright colours may separate and appear "crystallized" after drying.

Dip a soup spoon into your icing bowl and watch it drip back into your bowl. The drizzle should disappear into the icing within 3 to 5 seconds. If you shake the bowl from side to side quickly, all visible lines should disappear immediately and the top will be smooth and uniform.

****HINT
You may notice that your icing has lots of tiny air bubbles in it. For this reason, I like to make my icing a day ahead of decorating...to allow all those bubbles to rise to the surface. If that isn't possible for you, let your thinned icing rest at least an hour, covered with a damp cloth. When you return to it, you will see that the surface is covered in bubbles. Using a spatula, carefully mix the icing for a few seconds by hand and many of these bubbles will disappear.

After thinning the icing, I like to do my colouring. To tint your icing, you have many options. I prefer gels and pastes because they come in such a wide variety of shades and they are nice and bright without having to use a lot. Liquid food colouring is fine for pastels, but it does thin out your icing a bit and it isn't sold in as many colours. I find powdered colours are best left for candy and chocolate making techniques. If you are for a dark or bright colour like red, black, navy blue, etc. the Americolor brand seems the best choice I've come across. I've spent literally hours trying to tint icing and fondant these dark colours without much success, but a few drops of the concentrated Americolor does the trick easily.

As they always say, add a single drop of colouring to your icing at a time. A little really goes a long way and it is MUCH easier to go darker than to return to a lighter hue. If mistakes happen, add a bit of your white icing and mix again. For small batches that are too dark, a few drops of Icing Whitener does seem to help a bit. As your icing sits, the shade will darken slightly. If you are trying to achieve a very dark or bright colour, tint and let it sit for an hour or two. You'll be surprised at the deepened colour when you return.

To fill, I prefer a #4 round tip WITH or WITHOUT outlining. Keeping your piping tip at least 1/4" from the edge of the cookie (or right beside the outline), circle the entire outline of the cookie and fill the inside in one smooth and even tracing movement, like a spiral ending at the centre. Put your bag down and grasp the cookie at the widest part.

Shake the cookie softly from side to side for 3 to 5 seconds, not lifting it from your work surface. (Gently and quickly...kind of like scratching a lottery ticket!) The icing will settlle and smooth out. It should be thick enough that it does not risk dripping over the sides. If it does, you are shaking it too roughly OR your icing may be too thin. Add a sprinkling of icing sugar to your batch and try again.

Put your piping bag down. Take a pin and immediately ease the icing into any missed corners. Wait a few seconds for any remaining air bubbles to rise to the surface and prick them with the pin.

Voila! A perfectly iced smooth cookie. Carefully lift the cookie without tilting it and place it on a rack or tray to harden for 12 - 18 hours before continuing. A flooded cookie will dry from the outer edges inwards, so it's good to have at least one extra cookie in your batch so that you can "test" the stiffness of your icing after a day. As it dries, you'll notice that the outer edges lose their glossiness and are slightly paler than the middle of the cookie

The smaller the cookie, the faster the surface will dry. A 4" cookie dries nice and hard in 18 hours. You don't want to add decoration on top, especially anything coloured, until the base is dry to the touch...or you can risk denting the background and bleeding the 2 colours together.

After the icing is dry to the touch, finish decorating with scrollwork, dots, writing, etc. I prefer a #2 round tip for detailing and writing, using the thinned consistency of icing.

The possibilities for designs are endless. You can use superfine sugars to detail areas, attach gumpaste flowers for a 3-D effect and even paint on edible powders with a bit of extract or alcohol. Here, I've finished the Wedding Cake cookie with the names of the bride and groom, piped a little border in stiff icing along the base and decorated with 3 tiny dried gumpaste flower cutouts.

Any leftover icing is best stored at room temperature. If you aren't using it right away, you can pour it into sandwich bags and remove all the air before sealing. Or, place in an airtight container, pat plastic wrap or parchment paper directly onto the icing and attach the lid. I have kept it up to 30 days without worry. It will separate and thin slightly during storage, and will require a touch of icing sugar and a few minutes of re-mixing before using again.

Let the decorated cookies dry for a full 24 hours (from the time you finished the background flooding) or an extra 12 hours after additional decorating, before you package or stack the cookies to travel. (I don't recommend stacking these cookies, as the bottoms of cookies often scratch the icing below during transportation.)

Keep your cookies out of direct sunlight and in a cool room for storage. They do not like humidity at all, as the cookie will become softer and moist. I do not freeze my cookies, but I hear that some people are successful at it. They keep nicely wrapped individually for 1 week...10 days at the most before butter starts to get a rancid taste/odour.

Best Big Fat Chewy Chocolate Chip Cookies


Best Big, Fat, Chewy Chocolate Chip Cookies
(courtesy of All Recipes)

INGREDIENTS

  • 2 cups all-purpose flour
  • 1/2 teaspoon baking soda
  • 1/2 teaspoon salt
  • 3/4 cup unsalted butter, melted
  • 1 cup packed brown sugar
  • 1/2 cup white sugar
  • 1 tablespoon vanilla extract
  • 1 egg
  • 1 egg yolk
  • 2 cups semisweet chocolate chips

DIRECTIONS

  1. Preheat the oven to 325 degrees F (165 degrees C). Grease cookie sheets or line with parchment paper.
  2. Sift together the flour, baking soda and salt; set aside.
  3. In a medium bowl, cream together the melted butter, brown sugar and white sugar until well blended. Beat in the vanilla, egg, and egg yolk until light and creamy. Mix in the sifted ingredients until just blended. Stir in the chocolate chips by hand using a wooden spoon. Drop cookie dough 1/4 cup at a time onto the prepared cookie sheets. Cookies should be about 3 inches apart.
  4. Bake for 15 to 17 minutes in the preheated oven, or until the edges are lightly toasted. Cool on baking sheets for a few minutes before transferring to wire racks to cool completely.

Grandma's Oatmeal Cookies

A new oatmeal cookie recipe courtesy of www.recipesandentertaining.com

Grandma's Oatmeal Cookies

1 cup shortening
1 cup brown sugar, packed
1 cup white sugar
2 large eggs, well beaten
1 Tbs vanilla
1 1/2 cups flour
1 tsp salt
1 tsp baking soda
1 Tbs cinnamon
3 cups oatmeal (don't use instant)
3/4 cup chopped walnuts (optional)

Preheat oven to 350.

Cream shortening and sugars. Add eggs and vanilla. Beat well. Set aside.

Sift flour, salt, baking soda, and cinnamon. Add to first mixture and mix well. Add nuts and raisins if desired. Add oatmeal last.

Spoon out by rounded teaspoonfuls onto greased cookie sheets.

Bake for 10 minutes. Remove to a wire rack and cool completely.